Category Archives: Yeast

No Knead Brioche Buns

Brioche Bun, No-Knead

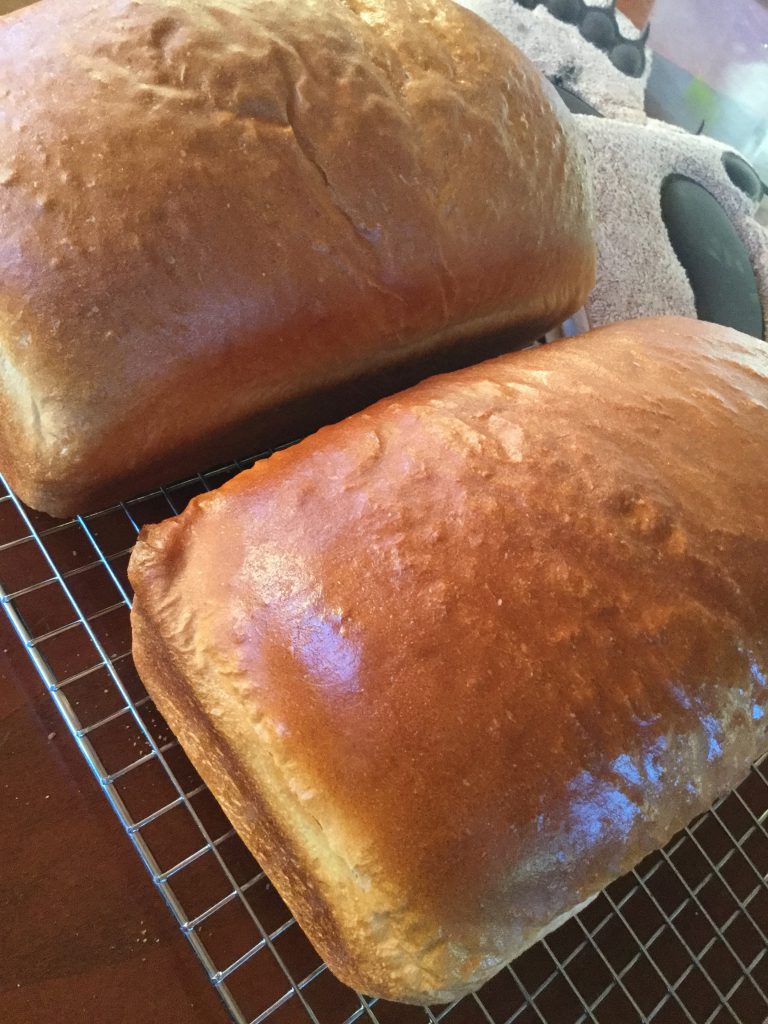
This recipe came through my feed the other day and since I was experiencing some back pain I thought I would give it a go! Not having to knead the dough was a back-saver. Now, I will tell you that I melted my butter…DO NOT… do it! Use softened butter as directed and you will get better results! I was rushing against the clock, trying to get the prep dishes washed up before we lost sunlight on the solar panels!  Next time? I would just let the dough rest overnight, I reckon and do them up properly!

For all the fancy photos, but no video, hop on over to Jo’s page! <a href=”https://www.jocooks.com/recipes/brioche-buns/?fbclid=IwAR0a1yj0ZbHDMiWSSFLduTxyU9zl6tMA7BVdnW4rQwDxp2zunngoi9GnvTk#wprm-recipe-container-32295/” target=_blank”> Jo’s</a>

Brioche Buns

1 cup water, lukewarm
2 Tbsp Sugar, divided
1 Tbsp Active Dry Yeast
1 cup Milk, lukewarm
1/2 cup Butter, melted
2 large Eggs, room temperature, separated
1 tsp Salt
4-6 cups Flour
6 Tbsp Butter, softened

Sesame Seeds, Poppy Seeds, Everything Bagel Seasoning, optional

Instructions

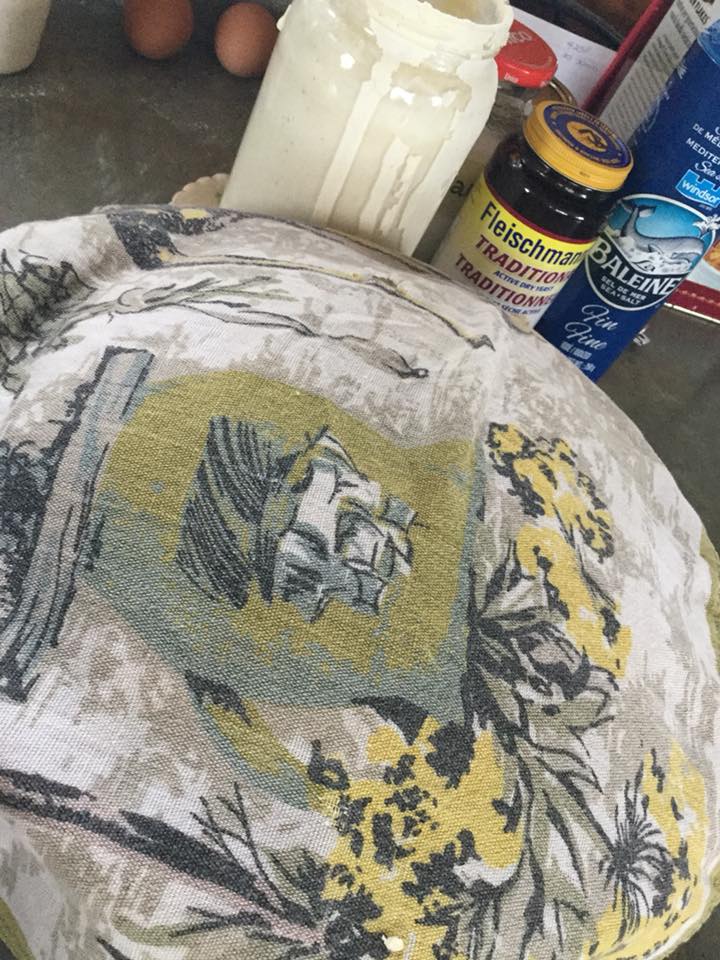
To large mixing bowl add your lukewarm water along with one Tablespoon of the sugar and the active dry yeast. Give it a stir and let rest for about 10 minutes, until frothy.

Next, sprinkle 2 cups of flour over the liquid.
Then add the remaining sugar, milk, melted butter, salt, egg whites and roughly stir everything together.
Add more flour, a cup at a time, until the dough comes together but is still a bit sticky and soft. I ended up using about 4 cups of flour as it is super dry out where I live.  You are looking for a sticky, elastic dough that will spring back when poked.
Use hand to roughly form a ball, gathering up any loose flour, then turn out onto work surface for a brief moment while you oil your mixing bowl well. Return dough to the oiled bowl, cover (I use an oiled pizza pan) and let rise in a warm, draft free place until doubled in size, about 1 to 2 hours.

Preheat oven to 375F.
Line two baking trays with parchment paper and set aside.

Punch down dough to release air and turn out onto lightly floured work surface. Spread the dough with your hands or roll out (I prefer using a rolling pin) dough into a rectangle, approximately 20x16inches.
Spread about half the softened butter over the entire surface of the dough. Fold in thirds, then roll the dough out a bit, maintaining a rectangular shape. Spread about 2 tablespoons of the remaining butter over the new rectangle, and fold it in thirds again, just like folding a letter. Roll the dough out a bit again then spread remaining butter over the top. Fold in thirds one last time. Roll dough so it is about 12x8inches.  All this folding creates layers like in croissants.
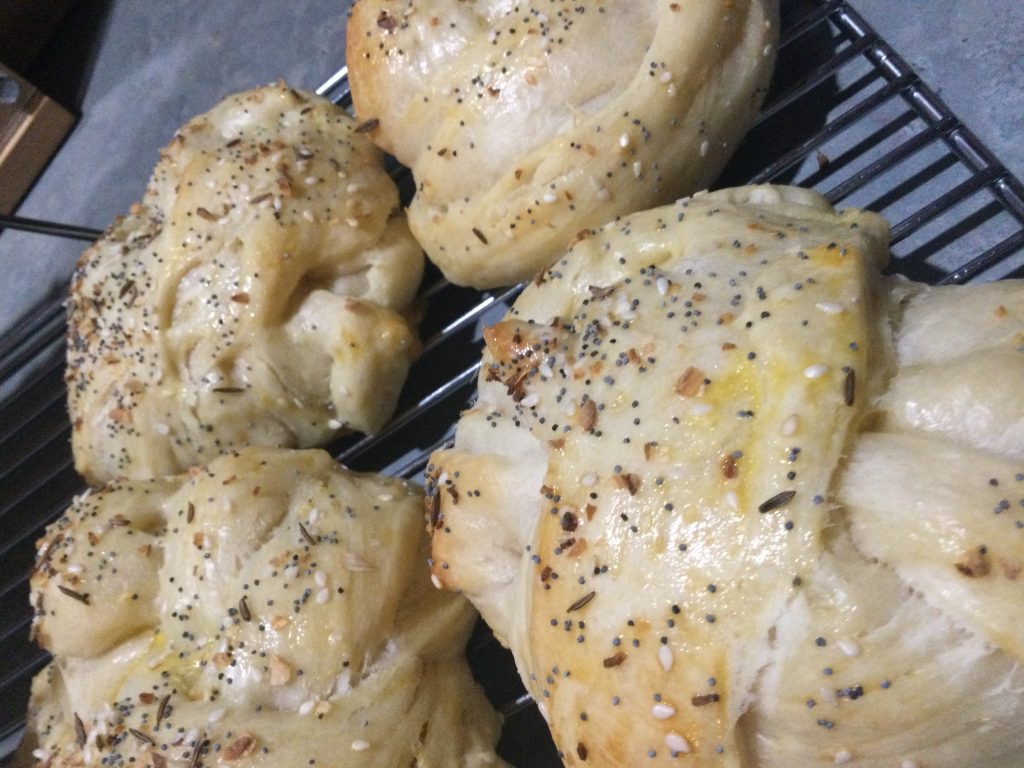
Using sharp knife cut the dough into 8 long strips, each strip about 1 1/2 inches wide. Fold each rope in two and twist it, then bring the ends together and pinch them to connect the rope. If your hands stick to the dough, just rub a little bit of oil on your hands..
Place the formed buns on the prepared baking trays, four to each tray.
Whisk egg yolks with about a tablespoon of water and brush each bun, generously. Sprinkle with topping of your choice; I highly recommend Everything Bagel Seasoning.
Bake in preheated oven for 20 – 25 minutes, rotating trays after 10 minutes. Allow buns to cool on baking trays for 10 minutes before transferring to wire racks to cool completely.

Enjoy the same day you baked them! You may store leftovers for up to three days in an airtight container.
They may also be frozen for up to three months.

Hybrid Sourdough Bread

sourdough bread
Sourdough Bread

We have been out here, in the middle of no where for … A G E S … Okay,  maybe not as long as it feels but well, let’s see, we are coming into our fourth Winter out here. And we can, quite definitively say, Winter is our FAVE season out here! Spring is a mucky mess, Summer is a buggy mess with always the threat of forest fires lurking in the background;  we have also learned that Fall can be mucky and windy and grey and dreary and….well, you get the picture! By the way, even though Winter is our FAVE, it can tend to drag on and on and on and on and on….Luke usually goes stir crazy by the end of it all; I tend to do a lil better but that is only because I just get up and leave!  Think Luke regrets purchasing a second vehicle….

Ummmm, I digress. Where was I going with that? Oh! I know! So our first Winter out here I started making Sourdough Bread! It is the quintessential Bush Craft, is it not? Our Brittany Blue has survived a forest fire, being evacuated, has traveled to the Fraser Valley, traveled to Kamloops, survived the hot and the cold; when I leave the Earthship for any amount of time, I take Brittany Blue with me because she can be quite demanding. I mean one time when I left I allowed Luke to babysit her and I am pleased to say that he DID manage to keep her alive; he took his babysitting duties very seriously!

Mine and Brittany Blue’s last trip out to civi the oven was not working at my temporary home with Michael and Hayley so I kinda, sorta didn’t make any Sourdough Bread! What!? Which means that when I went to make bread today I mighta had a bit of trouble remembering the recipe. Oooops.  I did my best to pull it all together but this ol’ brain of mine doesn’t remember stuff quite as well as it used to….

I will write up what I did today and make changes where changes need to be made as I dig into the deep dark recesses of my brain trying to recall the recipe. Or you know, go dig through my treasure trove of recipes…

Sourdough Bread

1 cup Starter
2 1/2 cups Warm Water
1 – 2 teaspoons Instant Yeast *
1 Tablespoon Sugar
1 Tablespoon Salt
5 – 7 cups Flour

Combine starter, warm water and yeast in a large mixing bowl; set aside in a warm, draft free place to allow yeast to bloom.
Meanwhile lightly spray two 9×5 loaf pans with vegetable oil spray and sprinkle with a bit of cornmeal; set aside.
After allowing yeast to bloom for about 10 minutes, measure 2 cups of flour into yeast mixture; sprinkle sugar and salt on top of the flour then stir in.
Continue stirring for about 2 minutes before gradually adding in remaining flour. You may have to use your hands to fully incorporate the last cup of flour.
Turn out onto floured surface and knead for about 7-10 minutes, forming a smooth dough.
Allow dough to rise in a lightly greased bowl; cover with a clean tea towel and let proof for about 90 minutes until dough has doubled in size.
Punch down dough, turn out onto lightly floured surface and gently divide dough in half.
Shape each half of dough into oval loaves and place in prepared loaf pans; cover with tea towel and let rise until doubled in size, about 1 hour.
About 45 minutes after the dough starts proofing, turn oven on to 425F.
Uncover loaves, make a slash in each, using a very sharp knife.
Bake the bread in preheated oven for 25 to 30 minutes until lovely and golden.
Remove from oven and immediately remove from pans to cool completely on a wire rack.


My Sourdough Journey

I use my paternal Grandmother’s ancient tea towel to cover my resting bread dough. So much Love.

While in the Fraser Valley I gave away some Sourdough Starter so I thought I would share with you how I use my Starter.
I tend to use a Sourdough Hybrid recipe which requires a bit of yeast because I live at higher elevations and it is pretty dang cold up there sometimes too! I love the look of the Cobb Sourdough Bread, love it’s crispy exterior but I find that when I split the dough and make two loaves I can make heaps more sammies with the same amount of dough. Right?
Then again, I often make up the Sourdough, cook off half of it as a loaf and the second half I make into Pizza! hmmmmmPizza! Sourdough Pizza Crust is the bomb!
I make Sourdough Pancakes too. I am still experimenting with that; the recipes I have used so far come out a little too flimsy and flat for my liking. Or am I just spoiled by my yummy, fluffy, oh so good but not so good for you Pancakes? So now I am drooling on my keyboard…
There are so many things you can do with Sourdough Starter and I have only just barely scraped the top of the iceberg! Sourdough is supposed to be good for you too; ah, yea! Bread that is good for me? Sign me up!  You can read about it here
https://iquitsugar.com/why-sourdough-bread-good-for-you/

I will give you the recipes and processes I use. I would love to know how your Sourdough Bread journey goes!
If I gave you a bit of Brittany Blue, please do try to take care of her. You need to feed her now and again. She does prefer to get used  in yummy baking, so use her often!

Brittany Blue
4 liquid ounces Water
4 weighed ounces Flour

When I make bread I use 1 cup of starter so I pour some Brittany Blue out then add the water and flour, stir well to combine and put her back  in her spot on the counter.
Let’s talk about where the starter lives:
I keep Brittany Blue on the counter because, frankly, my kitchen is often quite cool.  In the Summer when temps tend to be a lil warmer I put Brittany Blue out in the Cold Room where she seems to do quite well.
I do use Brittany Blue once a week so I tend to feed her the day before I want to use her, two or three days later and then once more the day before I use her to make more bread.
I don’t always use the 8 fluid ounces of starter that I remove; sometimes I just chuck it in the compost.

The two recipes I always use:

This one  I make into two loaves or a loaf and a pizza crust

https://www.kingarthurflour.com/recipes/rustic-sourdough-bread-recipe

Sourdough Bread Loaves make very yummy sandwiches
Sometimes I make one loaf of Sourdough Bread and use the remaining dough to make Pizza

This is the recipe I use to make a cobb of Sourdough Bread and it is damn delicious! No to ways about it! And the sound of that crackle when it comes outta the oven? Devine!
http://www.katie180.com.au/recipes/how-to-make-sourdough-step-by-step/

Sourdough Cobb in my Cast Iron Dutch Oven, easy peasy!

Honey Whole Grain Bread

Fresh out of the oven Honey Whole Grain Bread!

There is nothing better the smell of homemade bread permeating you home except maybe that first slice off that fresh outta the oven bread! Now I know there are some that say that you ought to let your bread sit for 24 hours before slicing into it but seriously? Who can wait that long? And besides, butter doesn’t melt into day old bread! It just doesn’t.  And toasting slices of day old bread so the butter DOES melt doesn’t even begin to compare with butter melting into that steaming slice you have just cut from the fresh out of the oven loaf of bread. Okay, I maybe wait 10 minutes because let’s face it, that loaf of bread is HOT when it first comes out of the oven. And having worked in a few bakeries where we made bread? I’ve burned my fingers, wrists, forearms on hot bread and hot bread pans more times than I can remember!

For this Honey Whole Grain Bread I have made adaptations to a recipe I found in my pilfered copy of Betty Crocker’s New Cookbook. Let’s see if I can find the recipe online? Fourth recipe and lo and behold! Woot! So you can go on over to Betty Crocker’s page and follow that recipe for Old-Fashioned Honey-Whole Wheat Bread to the T if you like. I don’t think I have ever made it exactly as specified. For one, I often halve the recipe to so I only make one loaf; if I had a freezer I might make the whole recipe so I don’t have to make bread so often. Wait! What did I just say? Making fresh bread is pretty simple so I actually prefer to make it often so I have fresh, fresh, fresh bread. That’s me though. Oh, and sometimes I make the whole recipe and use half to make bread rolls to go with a soup or stew that I might have simmering on the stove.

Now you go ahead and use an electric stand mixer if you like. Since moving off the grid I find I actually prefer to make bread by hand. The weather can be so fickle so half the time I can’t even use the mixer anyway – no sun or wind equal power conservation! Anyway, I find the kneading process pretty relaxing; 10 minutes of kneading, or 2 1/2 songs, as it turns out, and you have yourself 10 very rewarding minutes!

But right this minute? I have to go and shape the dough I have proofing in the oven. In the oven, you say? So in my current kitchen I have a propane stove that has a pilot light; that pilot light gives off just enough heat to make it the perfect place to both bloom my yeast and then proof the dough! Alright, dough shaped, proofed and baked. The bread rolls were great! The loaf of bread has cooled and is resting comfortably in a Tupperware container.

Alas, now it is too dark for me to read the recipe in the cookbook! I will have to come back to this tomorrow.

Honey Whole Grain Bread
2 1/4 cups very warm water (120F -130F)
2 pkgs (4 1/2 teaspoons) Active Dry Yeast
2 cups White Flour
1/3 cup Honey
1/4 cup (2 oz) Butter, cut into small cubes
1 Tablespoon Salt
3/4 cup Old Fashion Oats
2 Tablespoons Chia Seeds
2 Tablespoons Hemp Hearts
2 – 3 cups Whole Wheat Flour

Pour warm water into a medium to large size mixing bowl; add a pinch of sugar then sprinkle the active dry yeast over top.
Set bowl aside in a warm place to bloom the yeast; it takes about 10 minutes.
While yeast is blooming measure out the honey, butter, salt and white flour.
In a small bowl combine the old fashion oats, chia seeds and hemp hearts; set aside.
Once the yeast has bloomed, stir in 1 cup of white flour and stir vigorously; add butter and honey, continue stirring just until incorporated.
Add final cup of white flour, in a mound in centre of mixture; make a lil well in the centre of the mound and add salt.
Stir white flour and salt into mixture; stir vigorously for 2 minutes.
Add the oat, chia seeds and hemp hearts; continue stirring.
Add whole wheat flour, a cup at a time until you have a soft dough.
Turn dough out onto floured surface and knead for 8-10 minutes, until smooth and elastic; form into a ball.
Place ball of dough in a lightly oiled bowl, loosely cover with plastic wrap and a clean kitchen towel and let rise in a warm place for 40 – 60 minutes or until double in size. Dough is ready if indentation remains when touched.
Grease bottoms and sides of 2 loaf pans, 9x5x3 inches; set aside.
Punch down dough, turn out onto lightly flour surface, knead a couple of times just to create a rough ball; divide in half.
Flatten each half with hands or rolling pin into rectangle, 18×9 inches; try not to add too much flour to your work surface.
roll dough up tightly, beginning at 9-inch side, to form a loaf.
Press with thumbs to seal after each turn.
Pinch edge of dough into roll to seal.
Press each end with side of hand to seal.
Fold ends under loaf.
Place seam side down in prepared pan.
Cover and let rise in warm place for 25-50 minutes or until double.

Move oven rack to low position so that the tops of pans will be in the centre of the oven. Heat oven to 375F.

Bake bread 40 – 45 minutes or until loaves are deep golden brown and sound hollow when tapped.
Remove from pans to wire rack.
Brush loaves with a bit of butter, if desired.
Cool completely before storing in airtight container; will keep for 2 – 3 days, at room temperature.

Focaccia

I have to make Focaccia for my Professional Cook Level 2 Practical exam…well, I don’t HAVE to make Focaccia but it seems Dinner Rolls are frowned upon as …. That’s such a Grandma thing to make….well, hello? I AM a Grandma! I also have the choice of making a Baguette but the truth is, mine always tend to have gaping holes in them!  Anyway, I decided to make this Focaccia instead of my tried and true Dinner Rolls.
I have to admit, the second time I made this recipe, I was quite impressed! The first time, I made as recipe suggested and it came out thin and crispy – second time, I let the Focaccia proof for about 45 minutes before I baked it.

The original recipe came from my ancient The Canadian Living Light and Healthy Cookbook, page 38.

soft and chewy flatbread
Soft and Chewy Flatbread

Focaccia
2 Tbsp (1 Tbsp) Sugar
2 cups (1 cup) warm Water
1 Tbsp (1 1/2 tsp) Active Dry Yeast
5 cups (2 1/2 cups) Bread Flour
2 oz (1 oz) Butter, melted
1 1/2 tsp ( 3/4 tsp) Salt
Olive Oil for brushing loaf(ves)
Himalayan Salt
Rosemary
Thyme

*I only need to make 1 for my practical exam so I have listed the ingredients for a single Focaccia in brackets

In large bowl, dissolve sugar in water; sprinkle with yeast and let stand for 10 minutes or until frothy.
Using wooden spoon, stir in 3 cups (1 cup)  of the flour, butter and salt; beat until smooth.
Add enough of the remaining flour to form a soft dough.
Turn out dough onto lightly floured surface; knead for about 10 minutes or until smooth and elastic.
Place dough in greased bowl, turning to grease all over.
Cover with plastic wrap or damp tea towel and let rise in warm place for about 75 minutes or until doubled in bulk.
Punch down dough and divide into 2 portions ( No need to divide dough if only making one Focaccia).Form each portion into a ball.
Place on lightly floured surface and sprinkle with flour.
Cover an d let stand for 20 minutes.
Stretch and pull out each portion of dough into 16 inch (40cm) long oval.
Place on ungreased baking sheet.
Using side of hand, make ridges 1 inch (2.5cm) apart down length of each oval.
Brush each loaf with olive oil, sprinkle with rosemary, thyme and salt.
Cover loosely with tea towel and let proof in draft free for 45 minutes.
Bake in 375F (190C) oven for 25 to 30 minutes or until golden brown.
Remove from baking sheets and let cool on wire rack.
Makes 2 Focaccia  (1 Focaccia)
Each Focaccia serves 4 – 6 depending on use.