After attending SASET’s free (to Aboriginals) 16 week program I was so in love with the idea of cooking for a living that I signed up for the 39 week Professional Cook Level 1 & 2 program! Let me tell you, it is NOT free! And, after spending thousands of dollars on the program, I am going to say that if you know anything all about cooking, this program is NOT for you; challenge the ITA Exams instead!! It’ll save you thousands of dollars and give you the same feeling of satisfaction that you have achieved something great!
Okay, but that said, I mean, if you have worked in a professional Kitchen under a knowledgable Chef then you will not enjoy the course. If your kitchen experience to date is Maccas, A&W, or Wendy’s then, yea, for sure this will be a good experience for you.
Anyway, Level 1 is completed around February which I happily breezed through. Level 2 commenced, and after some extreme difficulty with a certain someone on staff in the Culinary Program (Hint- it’s not the Chef and it’s not Cashier Leah) I switched out of the daytime program to the evening course on offer. Which worked out really well because I had been hired as a Pastry Chef at Best Western Rainbow Country Inn at the beginning of March! Chef Dan Cool is an amazing person to work with – I did my SASET practicum at Garrison Crossing where Chef Dan was then stationed.
Sadly my health took a turn for the worse – I have been in Emergency more times than I can count, have had countless tests done, one surgical procedure with a very uncomfortable follow up appointment which had me bedridden for a few days, more prescription pills than you imagine and still, here I am 7 months later, still in more pain than a body ought to have to endure. Through it all I have soldiered on! Like I said, Chef Dan is amazing to work for! You will currently find me manning the Carvery & Omelette Station at our Sunday Brunches – I did try to put in extra hours for a bit but it wasn’t worth the effort as I would be bedridden, or close to it, for the remainder of the week.
As a result of my poor health I have yet to complete my Level 2! I did manage to write my outstanding quizzes over the summer, Yea, Me! But I still have to do my Practical Final and my Written Final. I have done a fair bit of studying for my written and just over the past few days have finally touched up the Practical Menu that I started months ago! I AM looking forward to finishing this course up, being able to say, “Look, Dad, I did it!” Please know that my dad passed away a gazillion years ago…okay 19 years ago. I spent my whole life trying to prove to him that, yea, I am good enough and smart enough and by golly, by gosh, I am!
Without further ado, I would like to share with you my menu…oh wait, another quick anecdote:
While writing this real menu, it brought back memes of the Fanciful Menu I wrote for SASET. What a great time I had writing that menu; the imaginary road trip across Canada that had me handpicking ingredients from each province and territory of our great country. I am very pleased to report that over the Summer I actually DID take a road trip across Canada! Well, to Thunder Bay, Ontario where my Australian husband was duly awed by Lake Superior! We took the northern route to Ontario, stopping in Jasper where I met up with a fellow classmate (Jordan) and also saw my niece, Jacqueline at Jasper Park Lodge (if you haven’t been there, go, NOW!); we returned along the Transcanada Highway which we thoroughly enjoyed. It was so great to see so much of Canada and awe inspiring to realize just how big Canada is! We have so much more to see!
Okay, NOW I will share with you the real menu that I will be using to complete my Professional Cook Level 2 training.

PC Lvl 2
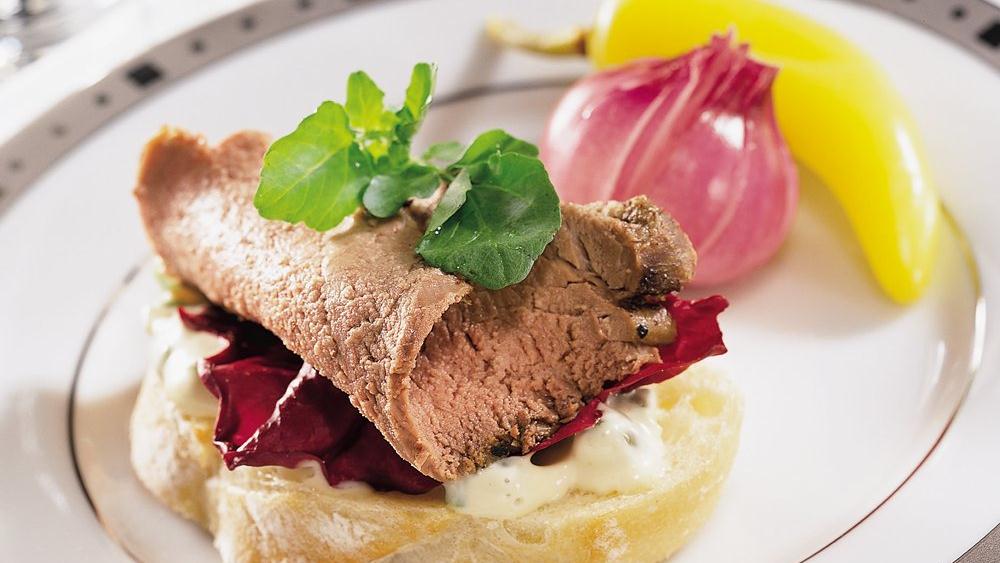
Cold Canapé
Beef Tenderloin Canapés with Mustard-Caper Sauce
| Metric | Standard | Ingredient |
| 225 gr | 8 oz. | Beef Tenderloin, trimmed |
| 5 ml | 1 tsp. | Olive Oil |
| Pinch | Pinch | Sea Salt |
| Pinch | Pinch | Fresh Cracked Pepper |
| 30 ml | 2 Tbsp. | Mayo |
| 20 ml | 1.25 Tbsp. | Finely chopped Green Onion |
| 7 ml | .5 Tbsp. | Drained Capers |
| 7 ml | .5 Tbsp. | Dijon Mustard |
| 15 ml | 1 Tbsp. | Horseradish |
| 9 | 9 | Slices Baguette Style French Bread |
| 9 | 9 | Radicchio leaves |
| 9-18 | 9-18 | Sprigs Watercress |
Directions
Heat oven to 450F.
Place beef tenderloin in ungreased shallow metal roasting pan or ovenproof skillet. Rub beef with oil.
Sprinkle with salt and pepper.
Place pan over medium high heat; cook until beef is browned on all sides.
Place beef in 450F oven.
Immediately reduce oven temperature to 375F; bake 15 – 20 minutes or until meat thermometer inserted in centre registers 140F (60C)
Remove beef from oven.
Cool for 30 minutes or until completely cooled. If desired, wrap tightly in plastic wrap until serving time.
Meanwhile, in small bowl, combine mayo, onions, capers, mustard and horseradish; mix well. Cover and refrigerate until serving time.
Slice beef very thin.
Spread bread slices with sauce.
Top each with small piece of Radicchio beef slice and watercress
Serve immediately, or cover loosely and refrigerate until serving time
http://www.pillsbury.com/recipes/beef-tenderloin-canapes-with-mustard-caper-sauce/f66e8c89-a654-47f5-83b6-09765fe668eb
Ingredients
8 ounces Beef Tenderloin
Olive Oil
Sea Salt
Fresh Ground Pepper
2 Tbsp Mayo
(2)Green Onions
7 ml Capers
7 ml Dijon Mustard
7 ml Horseradish
9 slices Baguette Style French Bread
9 Radicchio Leaves
9 – 18 Sprigs of Watercress
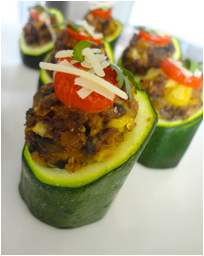
Hot Canapé
Stuffed Zucchini
| Metric | Standard | Ingredient |
| 7 ml | 1.5 tsp. | Olive Oil, divided |
| 1 | 1 | Clove Garlic, diced |
| ½ | 1/2 | Small Onion, diced |
| 110 gr | 4 oz. | Mushrooms, diced |
| 60 ml | .25 cup | Cherry Tomato, diced + 2 Whole Cherry Tomatoes for Garnish |
| 7 ml | 1.5 tsp. | Balsamic Vinegar |
| 22 ml | 1.5 Tbsp. | Whole Wheat Bread Crumbs |
| 30ml | 2 Tbsp. | Parmesan Cheese, divided |
| 2 | 2 | Small Zucchini, sliced on the diagonal, cored, leaving a base |
Directions
Preheat oven to 350F (175C)
Cut zucchini into 4-5 cm high chunks, on the diagonal; scoop out inside, leaving a 1 cm bottom. Finely chop the scooped out zucchini and use in the stuffing
Prepare Stuffing:
In large skillet, on medium high heat, heat 1/3 of olive oil
Add garlic, onion, mushies, finely chopped zucchini and tomatoes; sauté until mushies are softened, about 10 minutes.
Remove from heat and add remaining olive oil, vinegar, breadcrumbs and 1 Tbsp. Parmesan cheese; mix thoroughly.
Spoon equal amount of stuffing into each prepared zucchini round.
Bake on a foil lined cookie sheet for 10 minutes in preheated 350f (175C) oven
http://www.food.com/recipe/drop-dead-delicious-stuffed-zucchini-32080
Ingredients
Olive Oil
Clove Garlic
½ small yellow onion
4 oz. mushrooms
8 cherry tomatoes
Balsamic Vinegar
1 ½ Tablespoons Whole Wheat Breadcrumbs
2 Tablespoons Parmesan Cheese
2 Small Zucchini
Equipment
Oven
Stove Top/ Induction Burner
Cutting Board
Chef Knife
Measuring spoons
Scale
Sauté Pan
Heat Resistant Spatula/Wooden Spoon
Dessert Spoon to scoop out zucchini
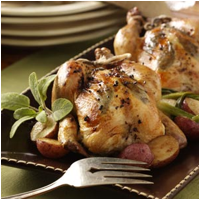
ENTREE – GAME HEN
| Metric | Standard | Ingredient |
| 1 | 1 | Cornish Game Hen |
| 6 | 6 | Fresh Sage Leaves |
| 2-4 | 2-4 | Lemon Wedges |
| 3 | 3 | Green Onions |
| 30 ml | 2 Tbsp | Butter, melted |
| 15 ml | 1 Tbsp | Lemon Juice |
| 2 | 2 | Garlic Cloves, minced |
| 5 ml | 1 tsp | Sea Salt |
| Pinch | Pinch | Freshly Ground Black Pepper |
Directions
Preheat oven to 375F.
Gently lift skin from hen breasts and place sage leaves under skin.
Place lemon wedges and a third of the onions in the cavities.
Tuck wings under hens; tie legs together.
Place in a small greased roasting pan.
Combine butter, oil, lemon juice and garlic; spoon half of the mixture over hens. Sprinkle with salt and pepper.
Bake 20 minutes. Add remaining onions to pan.
Brush hens with remaining butter mixture.
Bake 20 – 25 minutes longer or until a thermometer inserted in thickest part of thigh reads 170-175F (75C – 80C)
Remove hens to a serving platter.
Ingredients
1 Cornish Game Hen
6 Fresh Sage Leaves
1/2 Lemon
3 Green Onions
2 Tablespoon Butter
1 Tbsp Olive Oil
1 Tbsp Lemon Juice
2 Cloves Garlic
Salt
Pepper
Equipment
Oven
Cutting Board
Chef’s Knife
Turning Knife
Butcher’s Twine
Small Roasting Pan
Small mixing bowl
Wooden Spoon
Soup Spoon – for administering butter mixture
Pastry Brush
Thermometer
Serving Platter
http://www.tasteofhome.com/recipes/herb-stuffed-roasted-cornish-hens
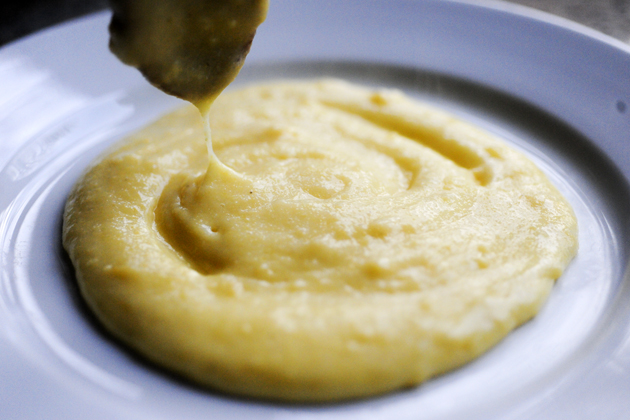
Entree – Polenta
Creamy Asiago and Sage Polenta
| Metric | Standard | Ingredient |
| 325 ml | 1 1/2 cups | Whole Milk |
| 250 ml | 1 cup | Polenta |
| 250 ml | 1 cup | Chicken Stock |
| 60 ml | 1/4 cup | Parmesan Cheese, grated |
| 30 ml | 1/8 cup | Asiago Cheese, grated |
| 1 | 1 | Sage Leaf, finely chopped |
| 1 | 1 | Sprig of Thyme, leaves removed |
| TT | TT | Salt and Pepper |
Directions
Bring the milk to a slow boil.
Slowly add the polenta, whisking constantly to avoid lumping.
Continue whisking and cook for 10 – 15 minutes, until very thick.
Add the chicken stock while whisking the polenta constantly.
Mix in the Parmesan, asiago, sage, and thyme.
Season with Salt and Pepper.
To serve, spoon some polenta onto a plate, garnish with Fresh Sage
Ingredients
1 1/2 cups Milk
1 cup Polenta
1 cup Chicken Stock
1/4 cup Parmesan Cheese
1/8 cup Asiago Cheese
2 leaves Fresh Sage
1 sprig of Thyme
Salt and Pepper
Equipment
Stove top / Burner
Saucepan
Liquid Measuring Cup
Dry Measuring Cups
Whisk
Wooden Spoon
Grater
Spoon for serving
Entree Vegetable #2
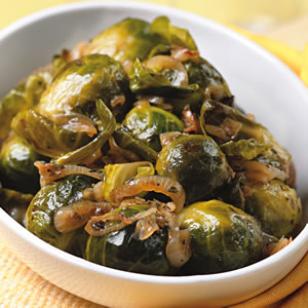
Braised Brussel Sprouts
| 15 ml | 1 Tbsp | Olive Oil |
| 1 | 1 | Shallot sliced |
| 113 gm | 1/4 lb | Brussel Sprouts, trimmed |
| 60 ml | 1/4 cup | Chicken Broth |
| 2ml | 1/2 tsp | chopped Fresh Thyme |
| TT | TT | Salt and Pepper |
Heat oil in a large skillet over medium-high heat.
Add shallots and brussel sprouts and cook, stirring often, until the shallots are starting to brown and the brussel sprouts are browned in spots, 2 – 4 minutes.
Stir in broth, thyme, salt and pepper; cover and reduce heat to medium-low.
Cook until the brussel sprouts are tender, 10 – 15 minutes
http://www.eatingwell.com/recipes/thyme_braised_brussels_sprouts.html
Ingredients
Olive Oil
Shallot
1/4 lb Brussel Sprouts
1/4 cup Chicken Stock
Fresh Thyme
Salt and Pepper
Equipment
Stove Top / Burner
Large skillet
Large Mixing Bowl – to hold brussel sprouts
Colander – to drain brussel sprouts after washing
Cutting Board
Chef’s Knife
Wooden Spoon
Liquid Measuring cup
Measuring Spoons
Plate, to serve
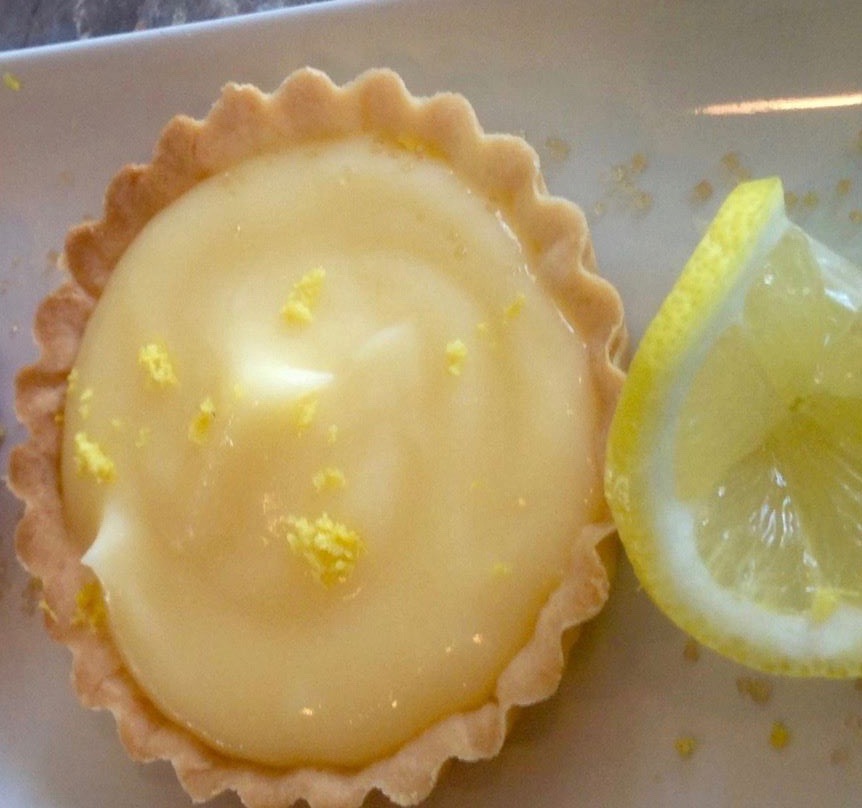
Sweet Short Paste Filled with Lemon Curd
| Metric | Standard | Ingredients |
| 70 g | 2.5 oz | Unsalted Butter, softened |
| 42.5 g | 1.5 oz | Sugar |
| 22.5 g | .80 oz | Whole Eggs |
| 100g | 3.5 oz | Pastry Flour |
Directions
Cream the butter and sugar in a large mixer bowl using the paddle attachment.
Slowly add the eggs to the creamed butter.
Mix until smooth and fee of lumps, scraping down the sides of the bowl as needed.
With the mixer on low speed, slowly add the flour to the butter and egg mixture.
Mix only until incorporated; do not over mix! The dough should be firm, smooth and not sticky.
Dust an 8” (20cm) round pan with flour. Pack the dough into the pan evenly,
Wrap well in plastic wrap and chill until firm.
Dust a clean work surface with a bit of flour, coat rolling pin with flour; gently roll dough out to 1/8” (3mm)
thickness.
Cut circles 2” (5cm) larger than tart pan.
Carefully transfer dough to tart pan, easing dough into pan.
Press dough around the edges of the tart pan, removing excess dough.
Dock dough, cover with plastic wrap and allow dough to rest in fridge for at least an hour.
Remove from fridge, cover loosely with L-Foil and ease into tart pan; fill with baking weights, dry rice or beans.
Bake weighted crusts at 400F (200C) for 10 – 15 minutes; remove weights and L-Foil and return crusts to oven.
Bake until golden brown and fully cooked, approximately 5 minutes.
Allow to cool completely before filling.
When cooled, fill with cooled Lemon Curd and return to refrigerator until ready to serve.
Reserve a slice of lemon to garnish Lemon Tart with
Ingredients
3.5 oz Pastry Flour
2.5 oz Unsalted Butter
1.5 oz Sugar
.80 oz Whole Eggs
Mint Leaves
Equipment
Food processor
Oven
Measuring Cups
Liquid Measuring
Measuring Spoons
Plastic Wrap
Tart tin
Rolling Pin
Fork
Baking Tray
L-Foil
Pie Weights
Mixing bowl
Whisk
Lemon Curd
| Metric | Standard | Ingredient |
| 118 ml | 4 oz | Lemon Juice, Fresh |
| 170 g | 6 oz | Sugar |
| 4 | 4 | Eggs |
| 170 g | 6 oz | Butter, cubed |
Directions
Zest and juice the lemons and strain
Mix the sugar and eggs together and then add the lemon juice
Cook in a double boiler, stirring constantly and scraping the sides and bottom of the bowl, until the mixture is very thick (curd will thicken at 170F (75C)
Whisk is butter and cool quickly in an ice bath
Strain, cover and chill – cover with plastic wrap, allowing wrap to rest directly on top of the curd.
Reserve a slice of Lemon for Garnish
Ingredients
3 Lemons
170 g Sugar
4 Eggs
170 g Butter
Equipment
Induction Burner
Zester
Cutting Board
Chef’s Knife
Strainer, small
Juicer, or fork for juicing lemons
Mixing Bowl, small
Wooden Spoon
Liquid Measure
Measuring Spoons
Scale
Double Boiler
Whisk
Heat Resistant Rubber Spatula
Thermometer
Mixing Bowl, Large
Ice
Plastic Wrap
Mixing Bowl Small
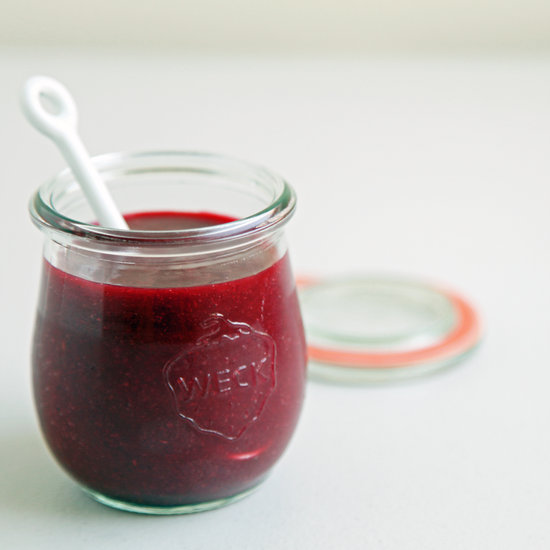
Dessert – Raspberry Coulis
| Metric | Standard | Ingredient |
| 350 g | 1 pint | Raspberries, fresh or frozen |
| 55g | 1/4 cup | Sugar, to taste |
| 15 ml | 1 Tablespoon | Lemon Juice |
| 2 ml | 1/2 teaspoon | Lemon Zest |
Directions
In the bowl of a food processor, place raspberries, sugar, lemon juice and zest.
Blend until pureed.
Place a fine meshed strainer over a bowl.
Pour the berry mixture through the strainer to remove the seeds, pressing down with a spoon to force the fruit and
juices through.
Transfer to a covered non-reactive container and refrigerate until ready to serve.
The puree will keep for several days.
Ingredients
1 pint Raspberries
1/4+ c Sugar
1 Tbsp Lemon Juice
1 tsp Lemon Zest
Equipment
Food Processor
Rubber Spatula
Measuring cups
Measuring Spoons
Fine Mesh Sieve
Mixing Bowl
Non-Reactive Container – squeeze bottle
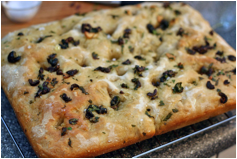
Focaccia
| Metric | Standard | Ingredient |
| 15 ml | 1 Tbsp | Sugar |
| 250 ml | 1 cup | Warm Water [(105F-110F) 40C-43C] |
| 15 ml | 1 Tbsp | Active Dry Yeast |
| 600 ml | 2 ½ cups | Bread Flour |
| 30 ml | 1 oz | Butter, melted or Olive Oil |
| 4 ml | ¾ tsp | Salt |
| 60 ml | ¼ cup | Olive Oil for brushing on focaccia |
| TT | TT | Sea Salt |
| Sprinkle | Sprinkle | Rosemary and Thyme |
Directions
In large bowl, dissolve sugar in water; sprinkle with yeast and let stand for 10 minutes or until frothy.
Using wooden spoon, stir in 1 cup of the flour, butter and salt; beat until smooth.
Add enough of the remaining flour to form a soft dough.
Turn out dough onto lightly floured surface; knead for about 10 minutes or until smooth and elastic.
Place dough in greased bowl, turning to grease all over.
Cover with plastic wrap or damp tea towel and let rise in warm place for about 75 minutes or until doubled in bulk.
Punch down dough form into a ball.
Place on lightly floured surface and sprinkle with flour.
Cover and let stand for 20 minutes.
Stretch and pull out dough into 16 inch (40cm) long oval.
Place on ungreased baking sheet.
Using side of hand, make ridges 1 inch (2.5cm) apart down length of oval.
Brush loaf with olive oil, rosemary, thyme
Let stand for 15 minutes.
Bake in 375F (190C) oven for 25 to 30 minutes or until golden brown.
Remove from baking sheets and let cool on wire rack.
Makes 1 Focaccia
Each Focaccia serves 4 – 6 depending on use.
Ingredients
15 ml Sugar
250 ml Water
15 ml Active Dry Yeast
625 ml Bread Flour – 600 for recipe, flour for board, rolling pin
30 ml Butter, melted or Olive Oil
Salt
Rosemary
Thyme
Equipment
Oven
Warm place to bloom yeast and proof dough
Liquid measuring cup
Large mixing bowl
Wooden Spoon
Measuring spoons
Dry Measuring Cups
Wooden Cutting board, very clean or Marble slab
Plastic wrap
Clean mixing bowl to rest dough in
½ size baking sheet
Rolling pin
Bread Board
Sharp knife