Perogies with Creamy Bacon Sauce

Perogies with Creamy Bacon Sauce

So funny! Just finished doing the dishes after throwing together an easy, peasy, super quick Perogy thing that we do and I no sooner sat down when I received a text from my daughter, “Remember that perogy sauce that Aunty Sabine used to make? With bacon and white sauce, I think. Do you have the recipe? Have a craving.”
Now I don’t really remember exactly how Aunty Sabine used to make it but I remember the basics; admittedly, I don’t make it all that often …probably because, well, for a few years there we lived in Australia and you can’t get perogies over there. Yes, yes, I could have made them from scratch but the one and only time I ever did that, they didn’t turn out ….at all! Floury, goopey mess, is what they were. So I leave perogy making to the experts: Potato and Cheddar or Potato and Onion for myself and I am sure my family would love the Bacon ones!
Now Aunty Sabine used back bacon, and I have a few times but more often than not I had regular bacon on hand  and that works just as well. Tonight I even subbed in sliced ham!
Alright, without further ado….

1/2 lb Bacon, chopped (or Back Bacon or Sliced Ham)
1 Onion, thinly sliced
1 – 2 cloves Garlic, minced
2 cups Whipping Cream
1 Tablespoon Sugar
1 Tablespoon Vinegar

Perogies, cooked according to package directions

In a deep skillet, fry bacon.
Once bacon is half cooked, add in onion and garlic and continue cooking until bacon is slightly crispy.
Pour in whipping cream; add vinegar and bring to a boil.
Reduce heat to medium – low until reduced and slightly thickened.
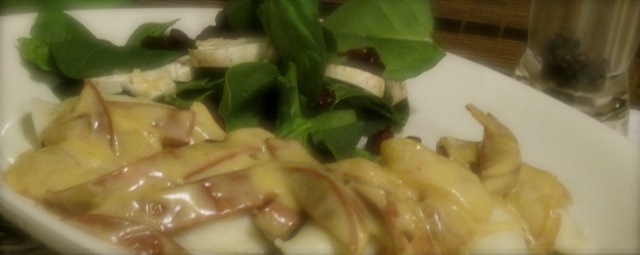
Serve over prepared Perogies.


Apple Nachos with Peanut Butter & Chocolate Dipping Sauce

A life-long friend of my daughter’s recently posted a pic of Apple Nachos on her FB page; I thought it looked interesting and that I might give it a try sometime. Today was “Sometime” so I went back to the pic posted, had a good look at the ingredients and gave it a go. I happened to have a bit of whipped cream sitting in the fridge (from the Coconut Cream Pie that my daughter Krick made yesterday) so I incorporated that with the left over Nutella and Peanut Butter to create sinfully delicious dipping sauces to adorn any fruit slices that may have missed out on being drizzled with decadent chocolate or peanut butter.
I am going to try this again using hot sauce and shredded cheddar! My husband says that sounds weird but I used to love having an apple with a hunk of cheddar cheese for a snack after school! And an old family friend introduced me to the idea of having hot sauce on slices of apple and I loved that too!
I know this is a Snack food but it is what I had for Lunch on a day that I was not feeling particularly cheerful. The preparation of this dish took my mind off things for a bit, I got to enjoy Peanut Butter, my all time fave comfort food, and all of a sudden things were not so gloomy anymore. Sometimes you just have to indulge, right?
I am sure there is an original recipe for Apple Nachos out there somewhere but I have no idea who to give credit to for  such a simple, tasty treat. Kudos to you, whomever you are!

Apple Nachos with Nutella and Peanut Butter Dipping Sauce

*3 Apples
2 teaspoons Lemon Juice
1/4 cup Chopped Pecans
1/4 cup Almonds
1/4 cup Dried Cranberries
1/4 cup Coconut
1/4 cup smooth Peanut Butter
1/4 Nutella
A large pinch of Cinnamon

1 cup Whipped Cream, optional

Wash, core and slice fruit.
Place sliced fruit into a bowl/container with a fitted lid; add lemon juice. Put lid on and toss to coat fruit with lemon juice.
Dump fruit slices out onto a large plate.
Sprinkle with dried cranberries, almonds and pecans.
In a small heatproof bowl, microwave peanut butter for about 30 seconds, or until slightly melted and of drizzling consistency; using a spoon, drizzle over fruit and nuts.
In another small bowl microwave Nutella for about 20 seconds, stir, heat for another 5 seconds if needed, using a spoon, drizzle over fruit and nuts.
Sprinkle coconut over all.
Serve with Dipping Sauce, if desired.

Dipping Sauce:
Divide whipping cream between the remaining peanut butter and nutella bowls, stirring each just until blended.

* I used 1 Golden Delicious Apple, 1 Fuji Apple and 1 Bartlett Pear


Mini Pancake Bites

A little while back my younger daughter sent me a text asking me how to make pancake bites; I guess she had seen the idea somewhere in cyberspace! I googled it myself and sent her a link but didn’t bookmark it, thinking I would never make them. As it turns out, I now regularly cook for a grade school class and am always looking for quick, easy breakfast or healthy snack ideas! Now I wish I HAD bookmarked it. S’all good, I just googled “pancake bites” again and followed the basic directions at Bakerella to create my own version of YUMMY! Oh my! When I was turning them out to cool I could not help but eat at least half a dozen of them!

I really like Pancake Bites because they are easier to eat out of hand over regular mini pancakes. Go ahead, make these, and I dare you to eat just one!

Pumpkin Chocolate Chip Pancake Bites - Make Pancake Bites using your favourite Pancake Recipe.
Pumpkin Chocolate Chip Pancake Bites – Make Pancake Bites using your favourite Pancake Recipe.

Use your favourite Pancake Recipe. I used Mini Pumpkin Pancakes or:

2 cups Flour
2 teaspoons Baking Powder
1 teaspoon Baking Soda
1/2 teaspoon Salt
4 Tablespoons Sugar
1 1/3 cup Milk (or Almond Milk)
4 Tablespoons Maple Syrup
2 large Eggs
4 Tablespoons Vegetable Oil
1 1/2 teaspoons Vanilla

Preheat oven to 350F.
Lightly spray 4 mini muffin tins; set aside.

In a large mixing bowl whisk together flour, baking powder, baking soda, salt and sugar, if using.

In a small mixing bowl whisk together milk, eggs, vegetable oil, vanilla and maple syrup, if using.

Add liquid ingredients, all at once, to dry ingredients and stir just until combined; a few lumps may remain.

Evenly scoop batter into prepared muffin tins up to 2/3 full.
Bake in 350F oven for 10 – 15 minutes or until golden brown.
Remove from oven and let rest in pans on wire racks for a few minutes.
Remove from muffin tins to cool completely or serve immediately with maple syrup, berry sauce or simply as is.

Chocolate Chia Pudding

I got lost in Food Heaven late last week! I clicked on a few pics on Pinterest, followed them to their pages and poked around at other pics that interested me. During my little adventure I came across a recipe for Chocolate Chia Pudding which I was pretty keen to try out since I currently only use Chia Seeds in my daily morning Green Smoothies.

You know how it is when you start out following a recipe and soon have come up with your own unique creation? First of all, I had half a cup of left over coffee sitting in a thermos…I know, I know! How is that even possible? I subbed the coffee in for a portion of the milk and then I was thinking, Caramel Macchiato so I added some Caramel Sauce.  I had some leftover whipped cream handy so I folded that in after the Chia Seeds had “set”. I don’t think it needed the whipped cream, again, I just happened to have it on hand; I certainly would not have whipped up some cream just for this recipe.

The recipe I started following said it was a single serve so I doubled it…wrong…my husband and I both had a generous serving and there are probably still four servings left! Which is all good because I am really liking this pudding! Reminds me of Tapioca, which I LOVE but hate to make.

Chocolate Caramel Chia Pudding

1 cup unsweetened Almond, Soy or Coconut Milk (I used Almond Milk)
1/2 cup Cold Coffee
2 Tablespoons Caramel Topping
3 Tablespoons Chia Seeds
1 teaspoon Cocoa Powder
1/2 teaspoon Cinnamon
1/2 Tablespoon Maple Syrup

In a  small measuring cup whisk together cocoa with about 1 Tablespoon of milk.
Combine milk, coffee, caramel topping, cinnamon, chia seeds, and maple syrup in a glass container with a fitted lid.
Add cocoa mixture and whisk everything together until well incorporated.
Refrigerate for at least four hours, stirring once an hour to keep the seeds from clumping.

Enjoy!

Notes:
– I made mine in a small pyrex dish with a lid.
– I did not stir it every hour, quite frankly I just left it for two days!
– I folded whipped cream the pudding before serving it; it didn’t need it.
– I will add another Tablespoon of Chia seeds next time.

Chocolate Chip Cookie Bars

I NEEDED to fill up the Cookie Jar, Fast! See, my husband bought me a lil sign to hang in the kitchen: “Grandmas never run out of Hugs or Cookies!” and the grandsons were on their way over so I needed to get some cookies baked. The only problem is that I had a Turkey in the oven! But no worries because I have this fancy new stove that has duel oven capabilities! So, next step, find something yummy to bake that I can do all in one hit and not be feeding baking trays into the oven all afternoon long; voila, Cookie Bars!

Now the only trouble is that they were so good my Cookie Jar is almost empty again!

I found the recipe at Very Best of Baking

Chocolate Chip Cookie Bars

1 cup Butter, at room temperature
3/4 cup Sugar
3/4 cup Brown Sugar
1 teaspoon Vanilla
2 large Eggs

2 1/4 cup Flour
1 teaspoon Baking Soda
1 teaspoon Salt
2 cups Chocolate Chips
1 cup Chopped Nuts (optional)

Preheat oven to 375F.
Lightly spray at 15×10″ jelly roll pan (cookie sheet with sides)

In mixing bowl cream together butter, sugar and brown sugar.
Add eggs, one at a time, stirring well after each addition; stir in vanilla.
Beat until light and fluffy.
Stir in flour, baking soda, and salt just until combined.
Add chocolate chips and chopped nuts; stir well.

Spread cookie dough onto prepared pan, patting it down with your hands and pushing it towards the corners. (very messy process!)

Bake in 375F oven for 20 to 25 minutes or until golden brown.
Cool in pan on wire rack.
Cut into bars.

Makes up to 48 bars.