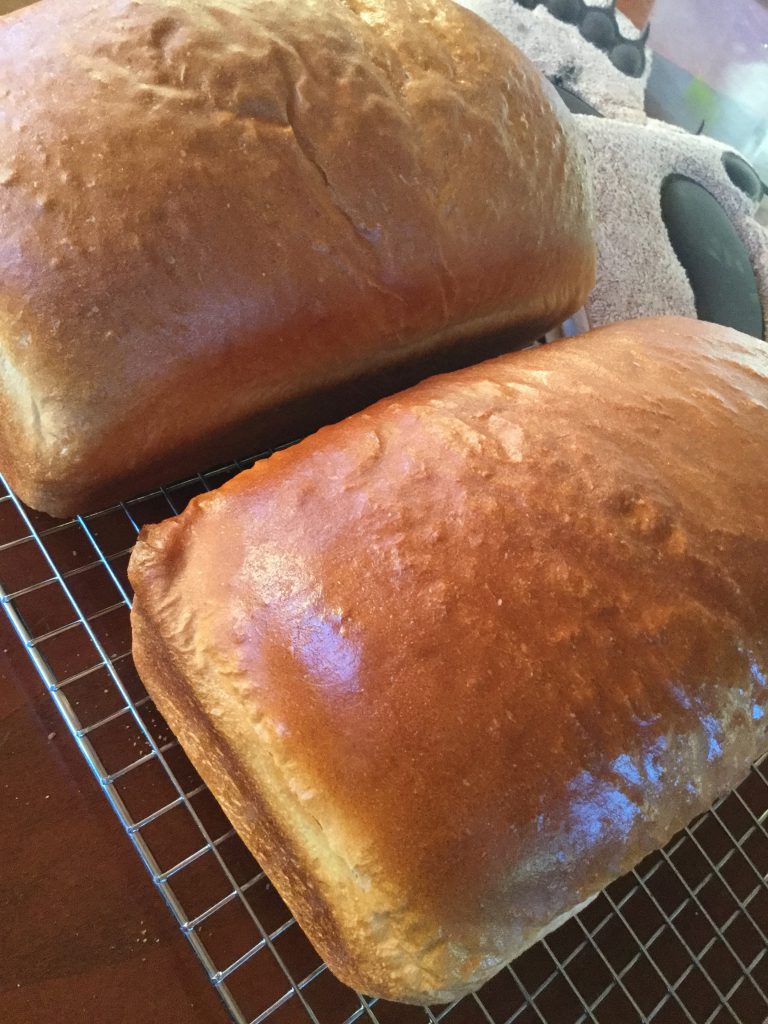
There is nothing better the smell of homemade bread permeating you home except maybe that first slice off that fresh outta the oven bread! Now I know there are some that say that you ought to let your bread sit for 24 hours before slicing into it but seriously? Who can wait that long? And besides, butter doesn’t melt into day old bread! It just doesn’t. And toasting slices of day old bread so the butter DOES melt doesn’t even begin to compare with butter melting into that steaming slice you have just cut from the fresh out of the oven loaf of bread. Okay, I maybe wait 10 minutes because let’s face it, that loaf of bread is HOT when it first comes out of the oven. And having worked in a few bakeries where we made bread? I’ve burned my fingers, wrists, forearms on hot bread and hot bread pans more times than I can remember!
For this Honey Whole Grain Bread I have made adaptations to a recipe I found in my pilfered copy of Betty Crocker’s New Cookbook. Let’s see if I can find the recipe online? Fourth recipe and lo and behold! Woot! So you can go on over to Betty Crocker’s page and follow that recipe for Old-Fashioned Honey-Whole Wheat Bread to the T if you like. I don’t think I have ever made it exactly as specified. For one, I often halve the recipe to so I only make one loaf; if I had a freezer I might make the whole recipe so I don’t have to make bread so often. Wait! What did I just say? Making fresh bread is pretty simple so I actually prefer to make it often so I have fresh, fresh, fresh bread. That’s me though. Oh, and sometimes I make the whole recipe and use half to make bread rolls to go with a soup or stew that I might have simmering on the stove.
Now you go ahead and use an electric stand mixer if you like. Since moving off the grid I find I actually prefer to make bread by hand. The weather can be so fickle so half the time I can’t even use the mixer anyway – no sun or wind equal power conservation! Anyway, I find the kneading process pretty relaxing; 10 minutes of kneading, or 2 1/2 songs, as it turns out, and you have yourself 10 very rewarding minutes!
But right this minute? I have to go and shape the dough I have proofing in the oven. In the oven, you say? So in my current kitchen I have a propane stove that has a pilot light; that pilot light gives off just enough heat to make it the perfect place to both bloom my yeast and then proof the dough! Alright, dough shaped, proofed and baked. The bread rolls were great! The loaf of bread has cooled and is resting comfortably in a Tupperware container.
Alas, now it is too dark for me to read the recipe in the cookbook! I will have to come back to this tomorrow.
Honey Whole Grain Bread
2 1/4 cups very warm water (120F -130F)
2 pkgs (4 1/2 teaspoons) Active Dry Yeast
2 cups White Flour
1/3 cup Honey
1/4 cup (2 oz) Butter, cut into small cubes
1 Tablespoon Salt
3/4 cup Old Fashion Oats
2 Tablespoons Chia Seeds
2 Tablespoons Hemp Hearts
2 – 3 cups Whole Wheat Flour
Pour warm water into a medium to large size mixing bowl; add a pinch of sugar then sprinkle the active dry yeast over top.
Set bowl aside in a warm place to bloom the yeast; it takes about 10 minutes.
While yeast is blooming measure out the honey, butter, salt and white flour.
In a small bowl combine the old fashion oats, chia seeds and hemp hearts; set aside.
Once the yeast has bloomed, stir in 1 cup of white flour and stir vigorously; add butter and honey, continue stirring just until incorporated.
Add final cup of white flour, in a mound in centre of mixture; make a lil well in the centre of the mound and add salt.
Stir white flour and salt into mixture; stir vigorously for 2 minutes.
Add the oat, chia seeds and hemp hearts; continue stirring.
Add whole wheat flour, a cup at a time until you have a soft dough.
Turn dough out onto floured surface and knead for 8-10 minutes, until smooth and elastic; form into a ball.
Place ball of dough in a lightly oiled bowl, loosely cover with plastic wrap and a clean kitchen towel and let rise in a warm place for 40 – 60 minutes or until double in size. Dough is ready if indentation remains when touched.
Grease bottoms and sides of 2 loaf pans, 9x5x3 inches; set aside.
Punch down dough, turn out onto lightly flour surface, knead a couple of times just to create a rough ball; divide in half.
Flatten each half with hands or rolling pin into rectangle, 18×9 inches; try not to add too much flour to your work surface.
roll dough up tightly, beginning at 9-inch side, to form a loaf.
Press with thumbs to seal after each turn.
Pinch edge of dough into roll to seal.
Press each end with side of hand to seal.
Fold ends under loaf.
Place seam side down in prepared pan.
Cover and let rise in warm place for 25-50 minutes or until double.
Move oven rack to low position so that the tops of pans will be in the centre of the oven. Heat oven to 375F.
Bake bread 40 – 45 minutes or until loaves are deep golden brown and sound hollow when tapped.
Remove from pans to wire rack.
Brush loaves with a bit of butter, if desired.
Cool completely before storing in airtight container; will keep for 2 – 3 days, at room temperature.