Dinner Rolls

One of the reasons that I love my Kitchenaid Mixer is because it takes the hardship out of making bread dough! Which, in turn, makes it very easy to make fresh dinner rolls to accompany hearty soups.
My husband recently bought me a bread maker so I tried the dough setting, which worked fine. The Recipe book that came with the bread maker didn’t have a Dinner Roll recipe so I used the White Bread recipe on the Dough setting. I shaped the dough, proofed the rolls, covered lightly with a clean tea towel in a slightly heated oven in which I then placed, on the oven floor, a bowl with about four cups of boiled water. I proofed them for about 45 minutes then baked them in a 400F oven for about 17 minutes (I had the time set for 18), removed them from the oven and immediately brushed with them with melted butter.
After all that effort? I was not too pleased with the dinner rolls! Why not? Because I was expecting these!
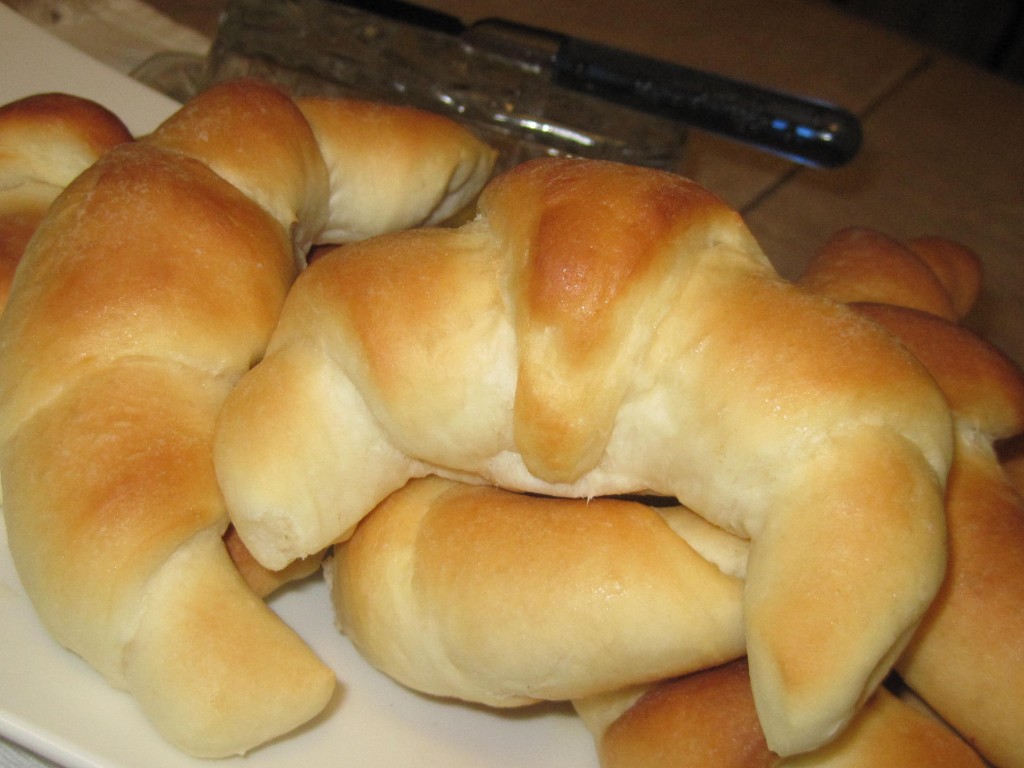
Dinner Rolls
Crescent Shaped Dinner Rolls

3 1/2 cups Flour
1/4 cup Sugar
1/4 cup Shortening (butter works too)
1 teaspoon Salt
1 Tablespoon Quick Rise yeast
1/2 cup very warm Milk (120F – 130F)
1/2 cup very warm Water (120F – 130F)
1 egg, lightly beaten
Butter, melted

Mix 2 cups of the flour, the sugar, shortening, salt and yeast in Kitchenaid mixing bowl.
Add warm water, warm milk and egg; using the Paddle attachment, beat on low speed for about a minute.
Scrape down sides of bowl and stir a couple of times.
Switch to Dough Hook attachment and slowly add enough remaining flour to make a soft, pliable dough.
Knead for about 7 minutes or until smooth and elastic.
Turn out onto lightly floured surface, knead a few times by hand to shape the dough into a ball; cover and let rise for 10-15 minutes.
Lightly spray two baking trays with vegetable oil spray; dust ever so slightly with cornmeal.
Divided dough in half; cover the half you are not working with.
On a lightly floured surface, roll dough out into a large thing circle.
Using a knife, cut dough into 8 wedges.
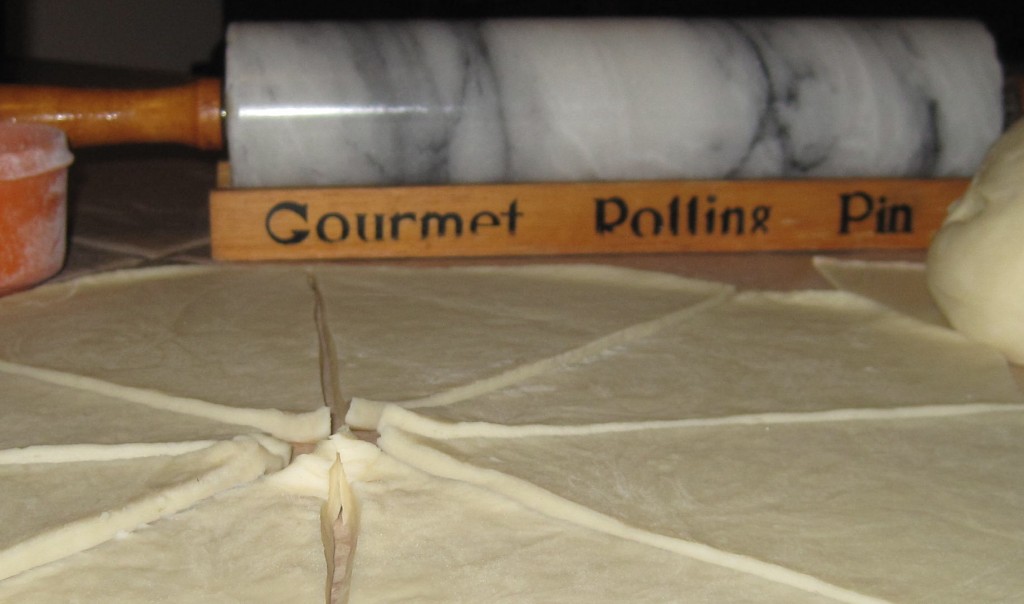
Crescent Shaped Rolls
Rolled out, cut and ready to roll up

Tightly roll each wedge, from base to tip, place on prepared baking tray, forming a C-shape with each roll.
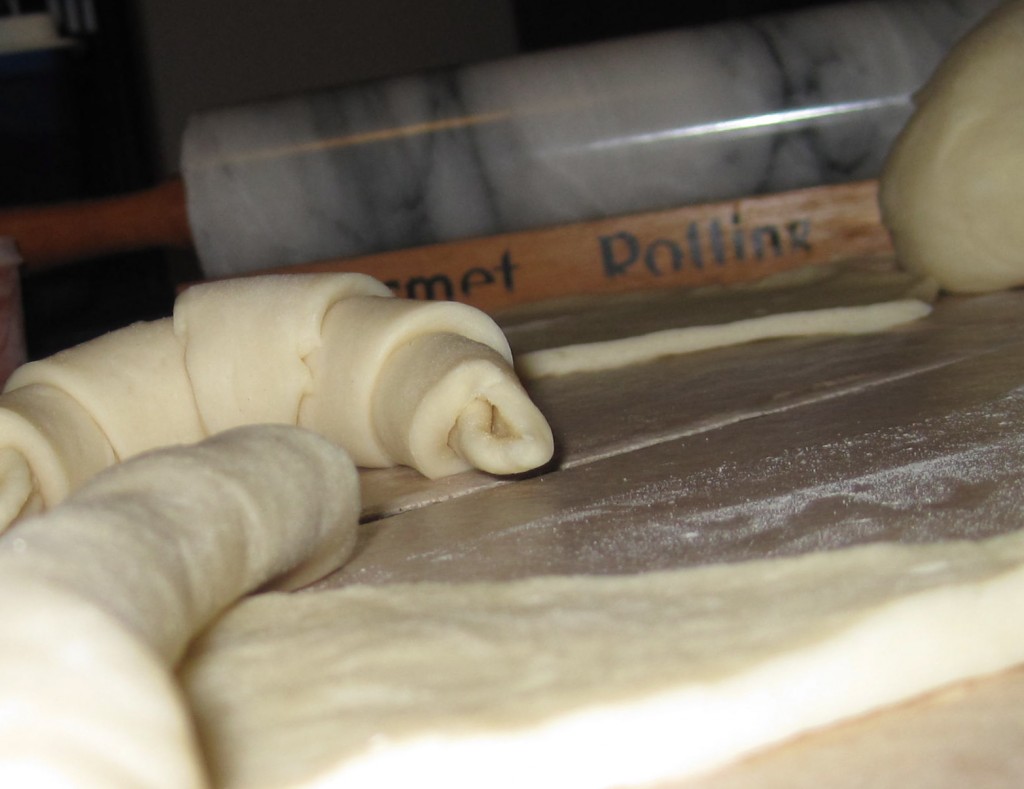
Roll up the Wedge to Win
Roll up the Wedge to Win!

Cover and let rise for about 30 – 40 minutes.
Heat oven to 400F.
Bake 10-12 minutes or until golden brown.
Remove from oven and immediately brush with melted butter.

Makes 16 Rolls

Split Pea Soup

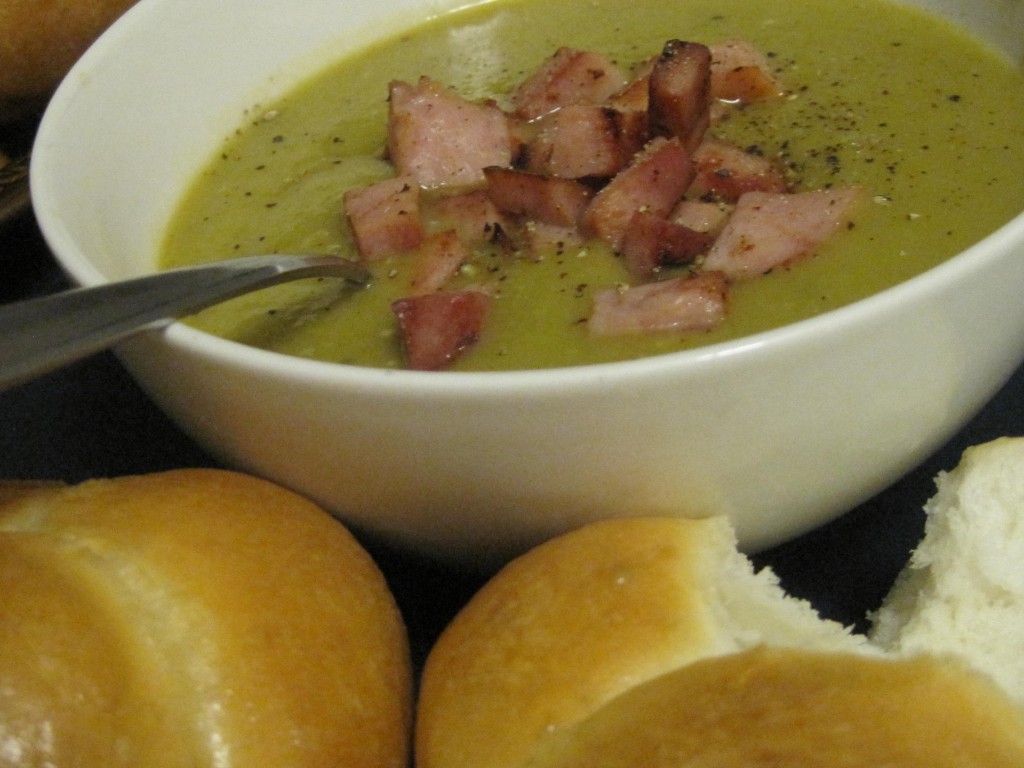
Winter had finally hit! When my husband was asked what he wanted for dinner he replied, “This cold weather calls for some kind of soup.” He jumped all over my suggestion of Pea and Ham soup, minus the ham. Well, I did add ham but I wanted to be able to eat it too so added pan-fried chunks of ham at the serving stage.

Split Pea Soup
Split Pea Soup-With the addition of Pan-Fried Ham

2 1/4 cups dried Split Peas (1 lb/454gm) sorted and rinsed
8 cups Water
2 McCormick’s Vegetable Stock cubes
1 large Onion, diced
2 stalks of Celery, finely chopped
1/4 teaspoon freshly ground Black Pepper
1 teaspoon Tarragon
3/4 teaspoon Thyme
3 carrots, grated

200 grams thickly sliced Ham, chopped

In large stock pot saute the onion in a bit of olive oil until soft.
Stir in chopped celery, tarragon and thyme and continue cooking for a few minutes.
Add split peas, water, pepper, grated carrots and vegetable stock cubes and bring to a boil.
Cover and simmer for about 3 hours, stirring occasionally.
I used an immersion blender to break down some of the split peas. If you don’t have an immersion blender, use a potato masher.
About 15 minutes before serving, pan fry the chopped ham over med-high heat until heated through and lightly browned.
Ladle soup into each bowl, add ham, if desired.
Top with freshly ground black pepper

8 servings

Original Recipe :
Crocker, Betty. “Betty Crocker’s New Cookbook.” Recipe. Split Pea Soup.  Minneapolis, Minnesota: Macmillan, 1996,

Pizza

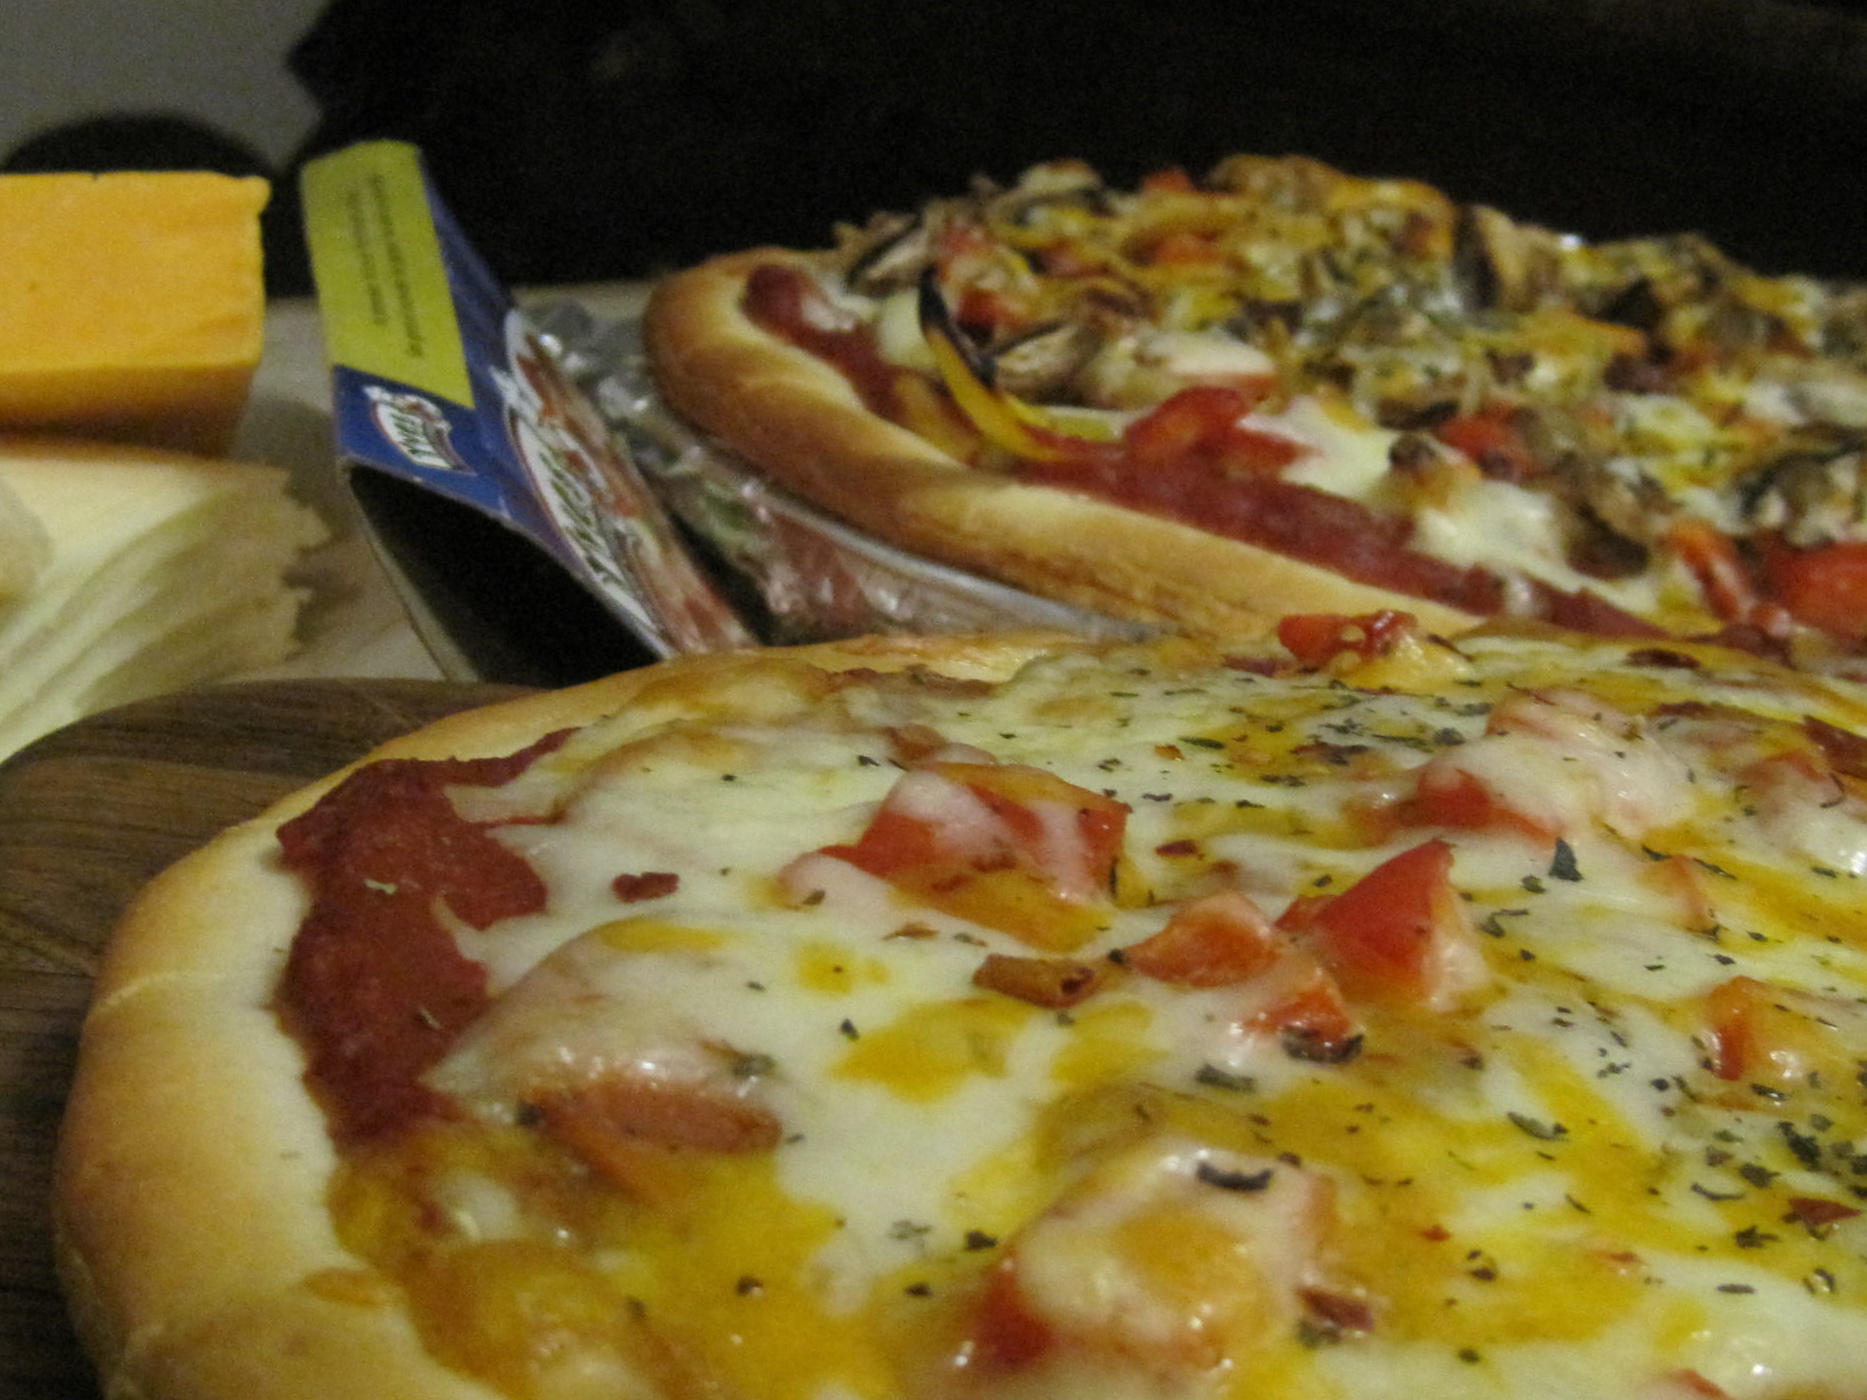
After a hectic week at work it is nice to unwind with a ooey, gooey slice of home made pizza fresh out of the oven. As you well know, I usually make my own pizza crust but sometimes it is nice to rely on Helpers! I bought some Pizza shells at Real Canadian Superstore, I had some Yves Pizza Pepperoni and an assortment of cheeses on hand but truly lacked in the veggie department except for one yellow and one red pepper. Normally I would also use green pepper, spinach and tomatoes. Oh, but I did have a handful of mushrooms tucked away in one of the crisper drawers; I know, shocking that they weren’t in a Tupperware container, right? I blame it on lack of space in the very impractical fridge in my current kitchen.

Anyway, I had enough ingredients to throw together three pizzas so there will be some tasty cold pizza for lunch tomorrow!


Pizza Shells
1/2 425g can Tomato Sauce
3 Tablespoons Tomato Paste
1 Tablespoon of “The Mix” or Italian Seasoning
1 package Yves Pizza Pepperoni
1 1/2 cups shredded Mozzarella Cheese
1/2 cup shredded Cheddar Cheese
1 Tablespoon grated Parmesan Cheese

Olive Oil
1 large Onion, thinly sliced
1 1/2 teaspoon Garlic, minced
1  each Yellow Pepper, Red Pepper, sliced into thin strips
6 large Mushrooms, sliced
Basil
Oregano
Chili Flakes

Preheat oven to 450F.
Line pizza pans with LFoil for super easy clean up. Sprinkle with a bit of cornmeal.

In large skillet, saute onion in a bit of olive oil, over med-high heat for about 3 minutes.
Add garlic and continue cooking for a few minutes.
Add sliced peppers and cook until tender crisp.

While onion/pepper mix is cooking, mix together in a small bowl the tomato sauce, tomato paste and herbs.
Evenly spread the sauce over each of the pizza shells.
Top two of the pizzas with Yves Pizza Pepperoni.
Top one pizza with loads of the pepper/onion mixture along with the sliced mushrooms; reserve a little of the pepper/onion mixture to top the other two pizzas.
Top each pizza with some of each cheese.
Spread remaining pepper/onion mixture evenly over the other two pizzas.
Top each pizza with a sprinkling of dried basil, oregano and chili flakes.

Bake each pizza for 15 minutes in 450F preheated oven.
Slide pizza off baking tray, let cool for about 5 minutes then slice into wedges.

Serve hot!
Though cold Pizza is always pretty decent too!


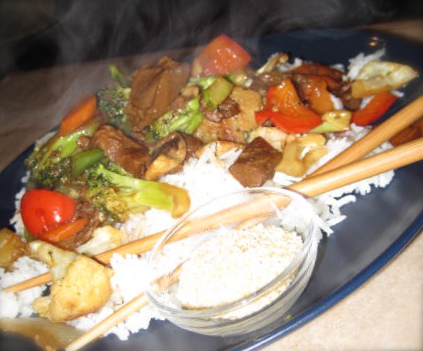
“Beef” and Broccoli with Yves Beef Strips

A great meal in a matter of minutes!Teriyaki "Chicken"
Teriyaki "Chicken"

Throw on a pot of rice.

While the rice is cooking sautee:

Onion, for a few minutes
Add some minced Garlic; cook for another few minutes.
Grate in a bit of Ginger root.
While that is cooking away, thinly slice a few peppers: red, green, yellow
Slice a handful of ‘shrooms.
Break flowerettes off of a head of Cauliflower as well as some Broccoli

Wash all under cold running water, drain well.
Throw into pan and cook over high heat until tender crisp.
Add strips of  Yves “Beef” Strips

Add a generous amount of bottled Teriyaki Sauce (1/2 cup) and heat through.

Serve immediately on a bed of hot Rice with Sesame Seeds to garnish.