I had some carrots that were no longer eye appealing and needed to be used up. I absolutely love to bake but, oh my, there is only so much baking one can consume! Summer has been a busy time for everyone so we haven’t had our regular Sunday Dinners where I can rely on the help of extended family members to empty the Cookie Jar or Cake Platter. Still, here I have all these grated carrots begging to be made into something, not just relegated to the deep, dark realms of the freezer which is now chock-a-block full of summer berries.
Well, you may or may not know that I discovered Cinnamon Roll Pancakes which are definitely less sinful than Cinnamon Rolls sooooo… I got to thinking you have to be able to make Carrot Cake Pancakes! Woot! All that yummy goodness with a fraction of the calories! I like to make extra Pancakes when I have the griddle heated and freeze the leftovers so we have Toaster Pancakes on busy work day mornings.
1 cup Whole Wheat Flour
1 cup Flour
2 teaspoons Baking Powder
1 teaspoon Baking Soda
1 teaspoon Salt
1 teaspoon ground Cinnamon
1/2 teaspoon ground Nutmeg
1/4 teaspoon ground Ginger
OR 2 teaspoons Epicure Apple Pie Spice
1/4 cup Brown Sugar
1/2 cup chopped Walnuts
1/2 cup Raisins
2 Eggs, lightly beaten
1/4 cup Butter, melted
1 teaspoon Vanilla
2 cups Buttermilk (If you don’t have Buttermilk – 2Tbsp Lemon Juice with enough regular milk to measure 2 cups, let stand for 10 minutes)
4 cups grated Carrots
Cream Cheese Drizzle
4 ounces Cream Cheese, softened
1/2 cup Icing Sugar
Vanilla
Milk – to desired consistency
If you don’t have buttermilk, set the milk to souring before you begin.
Melt the butter and let it cool while you proceed with getting your dry ingredients combined.
In small mixing bowl beat cream cheese until smooth.
Add icing sugar and vanilla, beating until no lumps remain.
Add a little milk (1 – 2 Tablespoons) if you want a thinner drizzle.
Set aside.
Preheat Griddle to 350F.
In mixing bowl combine flours, baking powder, baking soda, salt, spices and brown sugar.
Stir in chopped nuts and raisins.
In a small bowl, combine buttermilk, vanilla, eggs, melted butter and grated carrots.
Pour liquid ingredients, all at once, into dry ingredients.
Stir just until all the flour is incorporated, do not overmix.
Lightly spray griddle with non stick spray.
Ladle about 1/4 – 1/3 cup for each pancake, spreading the batter slightly ; cook for 3 – 4 minutes, until bubbles start to pop and edges are dry.
Flip over and continue cooking for another 3 – 4 minutes.
Transfer to serving platter.
Repeat with remaining batter.
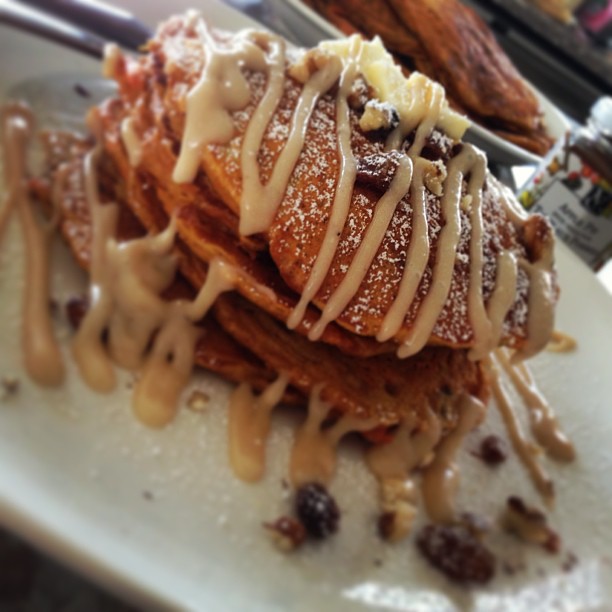
Serve warm with Cream Cheese Drizzle.
Freeze any leftovers and simply pop into the toaster to reheat when needed.
Makes 18 Pancakes
FYI – This is a ummm, goopy batter; don’t try to hurry these up by cranking up the heat coz you will end up with burnt outsides and raw insides…YUCK! Keep it at 350F and practice patience…or you know, clean all the surfaces in the kitchen if you are like me and can’t be trusted to be patient!